From Queens to Mexico City, and pretty much nothing in between.

Thursday, December 22, 2011

Christmas in Mexico City

Everybody knows that New York City is a traditionally magical place during Christmas. After three years of living in New York, the crowds, the cold and the cost can really get to you, and while I can't get rid of the crowds in Mexico City (it's the 2nd most populated city in the world), I can at least enjoy a plethora of free, government-sponsored events in the pleasant, temperate Mexico City winter weather.

For the past 5 years, the DF government has been providing its citizens with holiday events and free activities as part of their "Magia de la Navidad" (Magic of Christmas) program throughout the city. This winter's events included the traditional free pop concert at the Angel de la Independencia (Britney Spears - I passed, but I did see Marc Anthony last year), two holiday parades, the main street lined with lights and various nativity scenes, and a recreation of the entire city of Bethlehem with a life-size nativity in the Estadio Azteca.


But, the place to be, just like for all big events, is the zocalo, Mexico's town square and home to the Palacio Nacional (where the government "works") and the Catedral Metropolitana (the biggest church in Latin America). The main attraction is the hour-long sessions of free ice skating, but there was also the Cheetos movie trailer, which was showing film festival animated shorts, extreme sports simulators (snowboarding and biking), bouncy boxing rings, arts and crafts, and various displays for photo opportunities (all free!).


Last year, I spent hours in the airport and had my flight delayed for several days because of a White Christmas. This year, I'm dreaming of a Free Christmas with Temperate Weather.


Friday, December 16, 2011

Mexican Wedding Cookies

mexican wedding cookies
 So, this past week, I went to a Mexican wedding (my own, in fact, thank you), and I thought I was being clever by making Mexican wedding cookies for dessert. Unfortunately, no Mexican  that came had ever had such a cookie or heard such a name (although they were so enamored with the cookies that they asked me to make more), which made me realize that I have never seen a Mexican wedding cookie in any of the bakeries that I've been to. That then inspired me to go online and do some research, which pointed me in the general direction of New Mexico's official state cookie, the biscochito, which here in Mexico, we call polvorones, and at any rate, they're made from a pretty different recipe (for another day). So, Mexican wedding cookies are not as apt for an Old Mexican wedding as I thought.

However, in my American family, we never called them that anyway; we always just referred to them very uncreatively as pecan balls, and like Russian Tea Cakes, we eat them around Christmas time, so at least the season was apt. As for the wedding, we had a nice, homemade (by my husband) 3-tier tres leches cake, which was very familiar for our Mexican guests.

Ingredients
1/2 pound butter, softened
2 cups flour
4 Tbsp. sugar
2 tsp. vanilla
2 cups ground pecans
1/2 tsp. salt
powdered (confectioners') sugar for rolling

Directions

1 - Put the first 6 ingredients in a bowl. Mix together until they come together and form a very greasy ball of dough. Add more flour if necessary.

2 - Wrap the dough in plastic, and refrigerate for at least 4 hours.

3 - Remove from the refrigerator. Preheat the oven to 325* F.

4 - Remove pieces of dough from the ball and roll them into circles. They should be at least as big as bouncy balls, but they can be bigger if you like, just be consistent in size for an even baking time.

5 - Place on a baking sheet, and bake for 15 to 20 minutes.

6 - Carefully remove the hot cookies from the tray and immediately roll them in powdered sugar.

7 - Enjoy at Christmas, New Mexican weddings or any other time you like.


Monday, December 12, 2011

Ponche

ponche
Imagine warm fruit salad suspended in twice sweetened liquid with the typical holiday aromatics. That's ponche, a very popular holiday drink in Mexico. Ponche is enjoyed particularly during the posadas (the nine days before Christmas, starting on the 16th), Christmas Eve, Christmas itself and all the way up through New Year's Eve. It is usually made in one or two very large quantities so that it can last throughout all of these celebrations.

Ponche can be made with a variety of fruits, but tejecote, a specifically Mexican fruit, is the key ingredient. And, even though most Mexicans will leave this small bland fruit uneaten in the bottom of their glass, everyone agrees that without it, it would just not be ponche.

Ingredients
2 gallons water
2 1/2 pounds piloncillo
10 whole cloves
3 cinnamon sticks
1 pound tejecote
1 pineapple
3 whole oranges
8 guavas
2 pounds sugar cane
3 pears

Directions

1 - Prepare the tejecotes. In a medium saucepan, boil the tejecotes in water for 8 to 10 minutes. Allow them to cool, and then peel.

2 - Peel all of the remaining  fruit. Cut the pineapple into small chunks. Cut the sugar cane into 3-inch sticks. Cut the guavas in half. Cut the pears into small chunks. Divide the oranges into quarters.

3 - In a very large pot (we use a tamale pot), put water, piloncillo, cinnamon sticks and cloves, and bring to a boil over high heat.

4 - Add the tejecotes, pineapple, oranges, guavas, sugar cane and pears. Cover the pot with a lid, and return to a boil.

5 - Lower the heat, and simmer until the fruit is soft, about 2 hours.

6 - Serve warm with equal parts of liquid and fruit, and a spoon. (Do not eat the sugar cane! You just suck on it and then throw it out, or else be prepared to be really embarrassed in front of your Mexican friends.)

Thursday, December 1, 2011

Taco Night

tacos
Traditionally stateside, taco night comes from opening a pre-fab kit made by Old El Paso,  but, like most things, the authentic taco night is so much more delicious, and in this case, it's just as easy and still really fun.


There are a few simple guidelines you have to follow to make your tacos authentic Mexican tacos:

1 - You must use soft corn tortillas. If you can find tortillas taqueras (specifically for tacos), even better. You can recognize these because they are about an inch or two smaller in diameter than the average tortilla.

2 - Dip your tortillas in manteca (lard) before heating them up on the comal or griddle.

3 - Build your taco on top of 2 tortillas stacked together. Every taco always has 2 tortillas here; it helps support all of the juices of the meat, salsa and lime and is more filling.

4 - Shredded chicken is used for a lot of things down here, but, despite the leftover Thanksgiving turkey tacos in the photos, poultry is never found at the taco stands. Try steak, chorizo, or any imaginable part of pig for the real deal.

5 - Serve with raw onion and cilantro on top and lemon wedges, salsa and salt on the side for each person to add to taste.

6 - Garnish the plate with charred cebollin (like a giant scallion) or, failing that, roasted or sauteed onion wedges. These should be eaten beside the taco, not on top (but that is one custom that I like to ignore).

tacos7 - To accompany your authentic taco dinner, orange drink (like Tang, not soda) is very popular down here and my personal favorite, but tepache, jamaica and Pepsi (and probably Corona, too, for any drinkers) will also complete the meal nicely.

Friday, November 25, 2011

Mexican Thanksgiving Leftovers

Although Thanksgiving is not an official holiday down here, an awful lot of turkeys appeared in the supermarkets over the past two weeks, so I was able to celebrate in a grand traditional Thanksgiving way. For any who celebrated in a similar fashion, surely your refrigerator is stuffed with delicious leftovers, just waiting to be re-purposed. (Not ours unfortunately, we made light work of that 2 1/2 pound turkey breast.) And while Thanksgiving is all American, who says the leftovers need to be? Here are some Mexican-inspired ideas....


Shred some turkey breast, and do any number of things that are traditionally done with chicken. Turkey tostadas (2/7) are on the top of my list, but enchiladas (2/14) and chiles rellenos (3/16) would be good options, too.


Take some remaining turkey pieces and simmer them in some mole sauce (2/24) to enjoy over rice. Guajolote, a turkey-like bird, is actually one of the most common and traditional pairings with mole sauce.


Any corn can be remade elote street style with mayo, cheese and chili powder (8/29) or incorporate it into another dish, like Poblano rice.


Wrap small spoonfuls of mashed potatoes in corn tortillas, fry them up and have taquitos (5/25).


Happy Belated Thanksgiving, my fellow gringos, and Enjoy!

Monday, November 21, 2011

Tortas, the Ultimate Mexican Sandwich

torta
One of the Torta stands outside of the Division del Norte
Metro  Station
As a graduate of Rutgers College in New Jersey, I thought that I knew the ultimate sandwich experience. The "Grease Trucks" on the end of the main stretch that is College Ave. served up their "fat" sandwiches to broke and busy college students all day. For five bucks, I'd get french fries, mozzarella sticks, chicken strips and cheese steak (and well-earned indigestion) conveniently served up on a hoagie roll. Pretty ultimate, right?

torta
The "Cubano"
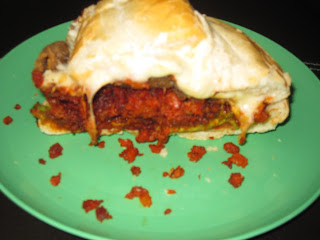
And then I came to Mexico, where I was expecting the ultimate taco experience (which I did receive and continue to on a regular basis), but I was also pleasantly surprised by the popularity of the torta, the Mexican sandwich. And, I'm sad to say, some of these tortas put the "fat" sandwiches of my college days to shame - they're cheaper, they're thicker and they have a larger selection of meats and cheeses - and they are just as popular as tacos as Mexico's favorite street food. A torta is a toasted bollilo (puffy and football-shaped) o telera (flat and round) roll with mayonnaise, chiles en vinagre, tomatoes, avocado and any combination of meat and cheese.


torta
The Argentino
I am fortunate enough to have a torta truck about 10 feet from my front door that's open about 22 hours a day and crowded for at least half that. When I go (in the downtime), I like to get the Milanesa (breaded steak and melty quesillo cheese) for less than $3 or the Argentino (the Milanesa plus chorizo) for exactly $3, but the most popular by far is their so-called "cubano", which does not meet the traditional cubano standards but includes jamon (ham), huevo (egg), salchicha (sausage), pierna (pork leg?), american cheese (that's obvious), panela (white cheese), milanesa (breaded steak) and queso de puerco (which is the weird parts of the pig - like cheeks and ears - pressed and chilled into a mold and then sliced) - plus, mayo, chiles, tomoatos and avocado, of course, all for $5. That's ultimate.

Monday, November 14, 2011

Sweetened Pumpkin

sweetened pumpkin

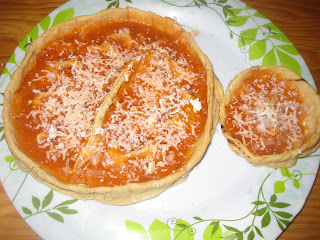
Fall is in full swing, and that means more holidays (and more days off), colorful falling foliage and just a couple of months when sweet pumpkin treats are quite popular. These are all true on both sides of the Rio Grande. While pumpkin pie can be found in the more gringa-influenced stores (like Costco), the real deal here is dulce de calabaza (sweetened pumpkin, I guess, would be the translation), which is popular from the end of October through Christmas.

This sweet pumpkin treat is very cheap and simple with very few ingredients (and no rolling out dough). Besides the pumpkin, the recipe calls for little more than the typical holiday aromatics of fresh cinnamon and cloves. While the process is time-consuming, you can spend most of the time watching football (or futbol) on the couch. A cinnamon-spiced house, football games and pumpkins finding their 15 minutes of fame - now, isn't that what the autumn holidays are all about?

Ingredients
1 kg. Castillian pumpkin (although I think other pumpkins may work as well; this is what we have here)
2 fresh cinnamon sticks
3 cloves
2 cones of piloncillo (or 2 discs of panela....or 2 cups of brown sugar, if you're in a pinch)
water

Directions
1 - Cut the pumpkin into 2 inch pieces, and put them into a pot - everything goes in, including seeds and fibers.

2 - Break the piloncillo into 2 inch pieces, and put them into a pot.

3 - Add the cinnamon and cloves to the pot.

4 - Add just enough water to cover it all (the actual amount will depend on your pot).

5 - Allow the mixture to simmer over low heat for at least an hour, until the pumpkin becomes soft and the water and piloncillo become a thick syrup.

6 - Enjoy! (For a unique serving a la Jonatan, sprinkle some powdered milk on top.) And, of course, also munch on the candied pumpkin seeds!

(PS - You can do something similar with papaya and regular sugar and have a very popular Venezuelan Christmas treat.)

Wednesday, November 9, 2011

Man Vs. Food - Sopes

sope
Living in Mexico has really cut into my TV traditions (which is probably a good thing), and while I can still enjoy Seinfeld because it's only subtitled in Spanish, Simpsons and Futurama only appear dubbed in Spanish...and you lose a lot of jokes when you lose the original language. As such, I have turned to Fox Life (who just subs most of its shows) and have rediscovered the wonderful Man Vs. Food to fill up my TV time. This is the only explanation to why I've been wanting to make all of my food much bigger recently.


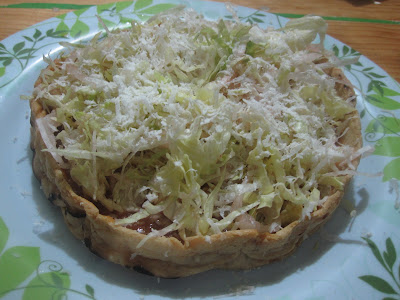
Man Vs. Food sees a lot of ridiculous-sized Mexican food, but it always seems to be burritos. They've been done, so I've decided on a Man Vs. Sope challenge. Jonatan and I could only eat 1 giant sope each, but we're not professional eaters. When we open our hypothetical Mexican food truck, the sope challenge will be 5 giant sopes and weigh more than 5 pounds (and the salsa is pretty hot, too, to add to the challenge).


To make your own giant sope challenge, you will need:
1.25 kg of masa (250 g each sope)
2 1/2 cups (500g) of salsa (1/2 cup each one)
125g of raw onion, chopped
125g of queso fresco, crumbled
375g of shredded cabbage

sope

I think that the next over-sized Mexican food challenge will be a Oaxacan tamale, based on a giant plantain leaf that I saw on a tree outside of my suegra's house...I have too much free time.

Wednesday, November 2, 2011

Dia de los Muertos

arbol de los muertos zocalo

Dia de los Muertos (November 2) is celebrated by going to a cemetery to share a meal with a deceased loved one. However, in case hanging out in the cemetery is not your thing or you don't have a loved one buried in Mexico, there are other  things going on in Mexico City and other places to go (although, I would like to make my position clear that these, while enjoyable, do not quite make up for the lack of Halloween down here). 


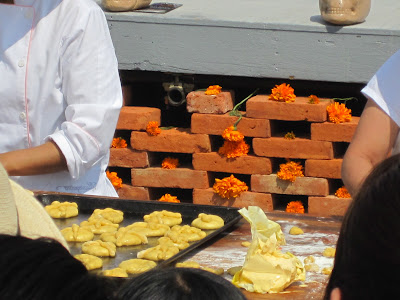
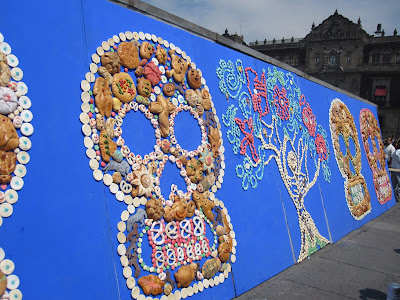
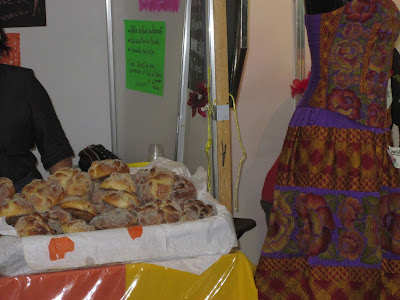
As with any big holiday, the place to be in Mexico City is the zocalo (the town square). During the week of Dia de los Muertos, you can find pan de muerto bread baking demonstrations, lots of ofrendas and this bizarre tree statue.


arbol de los muertos zocalo

pan de los muertos

pan de los muertos

dia de los muertos ofrenda

dia de los muertos ofrenda

dia de los muertos ofrenda

The zocalo may not be for everyone; it's usually very crowded and you may be more about food than ofrendas. For such people, I recommend Coyoacan's much smaller Pan de Muerto and Chocolate festival, where you can find some music, some ofrendas and lots of Mexican hot chocolate, pan de muerto and other culinary specialties.


pan de muerto and chocolate feria

pan de muerto and chocolate feria

Or, you can be a total loner (no judgement here), head out to any supermarket or bakery, pick up your own mini pan de muerto (for about 75 cents) and enjoy the soft, sugary orange bread in the comfort of your own home.


pan de muerto


Monday, October 24, 2011

The National Mole Festival


mole festival

mole festival


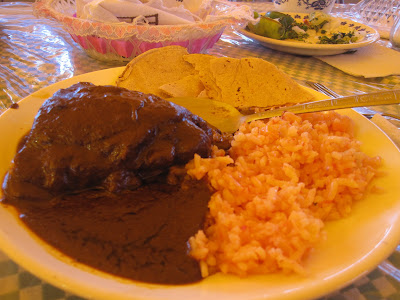
 This past Friday, we had quite an experience as we decided to make our way to the 35th Feria Nacional del Mole in San Pedro Atocpan in the southern, much less inhabited part of Mexico City (we refer to it now as our authentic pueblo experience).  A subway ride to the last stop, a light rail trip to the last stop, an hour wandering to find the bus and a 30-minute crowded bus ride later, we arrived at the Feria....the wrong one, the so-called New Feria del Mole, at which we were the only, fairly disappointed patrons. Luckily, we asked, and the real one was right across the street, maybe 50 meters down the road (and with its giant ferris wheel, I don't know how we didn't see it). After we checked out the real festival, we hopped back on the bus for the long journey home. Except all of the roads back to Xochimilco bus station were inexplicably closed, and everyone got out of their buses to walk home on the highway weaving their way through the cars (think Independence Day/Cloverfield style mass exodus); of course, we joined them.

mole festival
Authentic pueblo experience aside, the Mole Festival was incredible and exceeded everyone of my expectations once I got there. Of course, it had all the festival standards, like handicrafts, rides, games and a stage for traditional folk dancing, but also, as the name suggests, tons of mole! One side of the main festival boulevard was lined with stalls selling powders and pastes of the area's traditional almond mole, as well as other moles (like apple and pecan), pipians and even homemade peanut butter; the other side was filled with restaurants where all of these mole sauces and other traditional dishes were prepared. By the end of the boulevard, I  had collected about 12 mini spoons that had once held delicious samples of various moles, PB, honey, sherbet and jams - all fresh and locally produced. Then, it was time to circle back and pick a place to eat. The culinary experiences (and taste-tests) were definitely worth the journey.
mole festival
If you ever find yourself in Mexico City during the month of October, I highly recommend sucking up the journey and visiting this incredible fair, so here is some information (after the pic of the l'il horse) that might help you out, especially if you don't speak Spanish...

mole festival

mole festival

Feria Facts
www.ferianacionaldelmole.com.mx

 When: Every October, nearly everyday (From what I can tell, it starts on the first weekend and ends on the Sunday of the fourth weekend.)

Where: San Pedro Atocpan, Milpa Alta

            1) Rent a car or take a taxi and follow 
                 the directions on the website (it's 
                 only one highway, and the fair is 
                 located on the highway).
            or
            2) Take the blue subway line to 
                 Tasquena and transfer to the light 
                 rail. Stay on the light rail to the end,   
                 Xochimilco. Walk about 5 blocks 
                 from the train station to the town's 
                 center (walk in the direction of the 
                 big church). Find bus 81, and take it 
                 until you see a small misleading fair 
                 on the left and a giant, obvious fair 
                 further down on the right.

Cost: There is a very small admission fee of 5 pesos (40 cents) per person.
mole festival

Monday, October 17, 2011

Chiles in Vinegar

chiles in vinegar
When we lived in Queens, Jonatan would always have a can of pickled jalapeños at the ready to put on practically anything that I made, from Mexican food (obviously) to my homemade lasagna and pierogies. I used to find it insulting, but then I just accepted that he's Mexican.

Chiles en vinagre are generally jalapeños (or very occasionally chiles gueros) pickled in vinegar with carrots and onions. Vinegar, as always, is used here as a preservative, but Mexicans also seem to really enjoy the added flavor. The most common uses for chiles en vinagre are tortas, sandwiches and in patas en escabeche (pickled pig's feet, yum) - not with lasagna.

Chiles en vinagre are usually just bought canned in the supermarket (Herdez, La Costeña and La Morena are the most popular brands), but stuck with a kilo of jalapeños on the verge of going bad, we decided to try making them on our own (and it does turn out to be cheaper, if you're willing to put in the effort).

Ingredients
500 g water
200 g white vinegar
200 g jalapeños, cut in quarters lengthwise
100 g onion, sliced
100 g carrots, sliced
10 small dry bay leaves
oil for frying
salt and pepper to taste

Directions

1 - Heat a small amount of oil in a large saute pan over low heat.

2 - Add the carrots, and cook for 2 to 3 minutes. 

3 - Add the jalapeños and onions, and continue to cook for 5 minutes.

4 - Add the vinegar, and cook for about 15 more minutes.

5 - Add salt, pepper and bay leaves. Stir, and cook on low for 10 minutes.

6 - Add the water. Once the water boils, continue to cook the mixture for 5 to 10 minutes.

7 - Remove the bay leaves, and allow the mixture to cool.

8 - Put the chiles en vinagre mixture into glass jars with tight-fitting lids.

9 - Refrigerate, and enjoy for months and months.


Monday, October 3, 2011

Burritos

burritos
The burrito lunch special in Mexico City in Los Burros de la Condesa
According to the package of my burrito-sized tortillas, the idea of the burrito was invented during the Mexican Revolution (ca. 1910) in Ciudad Juarez, Chihauhau (near the border of Texas). The story goes that a local food vendor wrapped whatever filling in large flour tortillas to keep the food inside warm during transportation. So popular was this new food that he had to get a burro (a donkey for those super gringos out there) to carry all of his orders. Eventually, people started asking for the food from the burrito - and thus a new handheld food was born and named. (I don't know how true this is; I could not confirm on wikipedia, but why would Tia Rosa lie to me?)

burritosWith that story, the definition of a burrito is open to a broad range of interpretations - as long as whatever is completely wrapped in a giant flour tortilla. Here in Mexico City, the schmear of beans and the small quantity of cheese and meat served with fresh salsa and lime tastes delicious, but falls a bit flat (literally - there is not enough filling) next to the over-stuffed burritos of the American tradition.

Anything goes with burritos, so try this recipe (which I developed when jones-ing for a Qdoba 3-cheese burrito) or use it as a template for your favorite meats and salsas.

Ingredients
large (10-inch) flour tortillas
white rice
refried beans
steak, cut in thin strips
raw onion, diced
cilantro, chopped
cheese sauce (see 9/26 post)
(*all of the above should be warm or heated before assembly*)
salsa verde (see 2/16 post)
media crema, or sour cream
shredded Mexican cheese (see 8/1 post)


 Directions

1 - Heat tortilla 20 seconds in the microwave or on a comal. (Be careful on the comal that it doesn't get crispy, or it will be difficult to fold up.)

2 - Add a scoop of rice to the center.

burritos
3 - Add a spoonful of beans and the strips of steak to the rice.

4 - Sprinkle on some raw onion and cilantro.

5 - Add the cheese sauce, salsa verde and media crema.

6 - Sprinkle on some additional shredded cheese.

7 - Now, for the fun part - trying to roll it up! Fold in two opposite sides so that they meet in the middle, or even better overlap. Then, fold the other sides in to the middle in the same way, and flip it over to sit on its seam. (This is not how the professionals do it, but with only a 10-inch burrito and the amount of filling that I put in, you pretty much got to do whatever you can to keep it closed.)

8 - Enjoy! (And although ideally it should be handheld, I recommend having a spoon nearby for any rogue filling that escapes.)

Monday, September 26, 2011

Sunday Snacks - Chips and Dip

chips and dip
It seems like just yesterday I was writing about how authentic Mexican tostadas would be ideal fare for the Super Bowl. Nearly eight months later, the blog has accrued three followers (who are not friends or family members), and we're into the third week of our 2011 NFL season, ready to casually snack our way through Sundays.


Although you may not be ready for the authentic invasion of tostadas in your living room, nothing says football like chips and dip, and this little homemade effort is worth it for the resulting texture, flavor and freshness (plus, you know, the personal satisfaction). You can try all or part of this recipe, as well as build on to it. This particular recipe is our simple (no money) snacking chips and dip, but easily turn it into a meal with ground beef, beans or shredded chicken.

Ingredients

Chips
corn tortillas
salt, to taste
frying oil

Cheese sauce
1 Tbsp. butter
1 Tbsp. flour
2 cups milk
1/2 tsp. salt
1 1/2 tsp. crushed red pepper
2 cups Mexican cheese blend (see 8/1 post, Kirkland, Kraft, whatever)

Salsa
see recipe from 1/19 post or
use your favorite jar salsa

Directions

1 - Fill a large pan with at least 2 inches of oil. Heat the oil until very hot over high heat.

2 - Cut the tortillas into 6 triangles. Put a large handful of the tortillas into the hot oil. Cook for about 30 seconds, turn them and then cook for another 30 seconds or less (crisp, but not burnt).

3 - Remove the chips to a colander to drain the oil. Add a sprinkle of salt.

4 - Continue until there are no more tortillas.

5 - Turn the oven to 400*. Place a small empty oven safe bowl in it.

6 - Meanwhile, melt butter in a small pot over low heat. Add the flour and stir until the flour is cooked. Whisk in cold milk. Add salt and crushed red pepper. Simmer and stir until the mixture thickens.

6 - Remove from heat. Stir in the cheese until it's melted.

7 - Remove the bowl from the oven. Pour the cheese into the bowl to keep the cheese warm, and serve with the chips and salsa immediately. (The cheese will still harden quickly, but the bowl will slow that down, and in my experience, chips and cheese sauce never hang around for too long.)

Thursday, September 15, 2011

Chiles en Nogada (Happy Independence Day!)

chiles en nogada
Today is September 15th, and although Independence Day is officially the 16th, the celebratory festivities start tonight with the Grito de Independencia (the Shout for Independence, where everyone "viva"s all of the revolutionary heroes, and then fireworks!) Unfortunately, I'm not expecting the spectacle I witnessed last year for my 1st Mexican Independence Day, but, of course, the 201st birthday of the nation cannot overshadow its bicentennial.
One thing that has not changed though is the food. Pozole is particularly popular on this day (every supermarket has pig heads for half off!), but pozole is popular for big celebrations throughout the year. Chiles en nogada, however, are Independence Day specific, and were created as an accompaniment to patriotic spirit by sharing the colors of the Mexican flag - green chile poblanos, white cream sauce and red pomegranate seeds (which are added just because they're red, not for flavor). Chiles en nogada means, more or less, "walnut-ized chiles" in Spanish, called such for both the walnuts in the cream sauce and in the relleno, which also includes shredded chicken, apples and pears.
There will be no accompanying recipe for this today because chiles en nogada are not generally nor prepared at home due to the walnuts, apples and pears (which are all relatively expensive down here) and the difficulty in finding pomegranate seeds. Instead, every restaurant in the DF area will have signs up all throughout the month of September boasting their chile en nogada specials. (And if I had had any money, I would have bought some.)

chiles en nogada

Monday, September 5, 2011

More Birthdays (and More Tres Leches)

tres leches cakeMexico has other birthday traditions besides mañanitas and piñatas and tres leches cake, though this one that I have to share today is much less pleasant. After the cake is brought out and the candles are blown out, the chants of "Mordida, mordida" begin. Then, the birthday celebrator, with the help of someone nearby, goes head first into the cake for the first bite, covering their mouthal and nasal regions in frosting. No one escapes this tradition, not even my Mexican source's 91 year old abuelita (she went on her own though; you can't push an old lady). The "Beso, beso" chant commonly follows this, and the birthday celebrator must kiss a loved one nearby, thus sharing the frosting facial. Ridiculous photos must follow before you can actually go wash your face. (And, don't worry, the birthday celebrator has to eat the piece of cake that they put their face in.)

This weekend, Jonatan (my authentic Mexican source) had his birthday and, sadly, had to make his own cakes to celebrate (I at least bought the ingredients, but he's the experienced pastelero). In the last Tres Leches blog, I had a fancy and non-traditional chocolate cake, which was delicious, but authentic tres leches cakes are much more delicious and simpler. After about 15 tres leches filled birthday celebrations in the past year (big Mexican family), even the most common peach filled tres leches has grown on me. However, my personal favorite is the less common (due to the price) but still authentic pecan (or simply nuez, or nut) tres leches cake. I can't wait for the next birthday!

Ingredients
8 eggs
240g sugar
40g butter, melted but room temperature
240g flour

1 can of Lechera (sweetened, condensed milk)
1 can of Nestle Media Crema
1 can of Carnation evaporated milk
(note: we make 2 6-inch round cakes because the milk mixture is enough for two, and I have no idea what you could do with leftover tres leches.)

1 liter whipping cream
200g sugar
1 tsp. vanilla extract

1 large can of peaches in syrup
and
1 cup of pecans

Directions

1 - Preheat an oven to 350* F, and grease and flour 2 6-inch cake molds. Set aside.

2 - Mix the eggs and sugar in a stainless steel (or glass) bowl, and put the bowl over a bain marie (a shallow pan of water on low heat).

3 - Whisk constantly for 5 minutes, or until the mixture has tripled in volume. For the last minute, raise the flame to high heat.

4 - Remove from heat, and continue to whisk constantly until the mixture is room temperature, about 3 minutes.

5 - Gently fold the flour in to the egg mixture. Add the butter.

6 - Divide the mixture evenly into the 2 cake molds and put into the oven. Bake for about 20 minutes.

7 - While the cake is baking, mix the three cans of leches together. Stir well, and refrigerate until needed. Also, slice the peaches and toast and chop the pecans in preparation.

8 - Whip together the cream, sugar and vanilla until you have stiff peaks. Refrigerate until needed.

9 - When the cakes are done, remove them immediately from the mold, and cut them each into three layers.

10 - With a pastry brush, saturate the bottom layers, each with about 1/6 of the milk mixture. Then, put a layer of the whipped cream. Add pecan slices to one cake, and peach slices to the other.

11 - Put the next layer of cake on top. Repeat Step 10.

12 - Put the last layer of cake on top. Add the remaining milk mixture with the pastry brush.

13 - Frost the cake all around with the remaining whipped cream.

14 - Decorate with the very traditional designs shown in the picture, or however you feel like.

15 - Let the cake set up for at least an hour in the refrigerator (as long as you can stand the wait), and enjoy!


Monday, August 29, 2011

Esquite and Elote

elote
According to the Mayan creation story of the Popol Vuh, the gods first made man from mud and then from wood. After these two unsuccessful human prototypes and a flood to wipe them out, the gods decided on corn - and so began the slightly cannibalistic love affair that Meso-Americans have with corny cuisine.


Everyone knows of tortillas and chips; most are familiar with masa and its makings (like empanadas); but I don't feel that many people know how much fresh corn is featured in Mexican cuisine. Elote (on the cob) and esquite (just the kernels) rank among tacos and tortas in Mexico's favorite street foods. This, however, is not the Jersey sweet corn, smothered with squeezable "butter" at your Labor Day BBQ. Mexican corn is not sweet, and is traditionally served slathered with mayonnaise, rolled in grated cheese and sprinkled with chile powder. Once you get past the foreign flavor combination (and, I admit, it can take a while), this is quite tasty, both in a cup or on a stick.

Ingredients
4 ears of corn
4 Tbsp. mayonnaise
1 cup queso añejo, cotija or fresco (or finely grated parmesan)
2 tsp. chile powder

Directions

1 - Prepare the corn on the cob however you like - boiled or grilled. (Grilled in the husk is the popular way here - if you have a grill and want to be authentic.)

2 - Slather each ear of corn with 1 tablespoon of mayo.

3 - Sprinkle 1/4 cup of finely grated cheese on the mayo (it will stick to the mayo).

4 - Sprinkle each cob with 1/2 teaspoon chile powder (or as much as you can take; it will also stick to the mayo).

5 - For esquite, fill a cup with cooked corn (fresh, can, frozen - your choice), top with the mayo, cheese and chile powder.

6 - Enjoy either way!

Monday, August 8, 2011

Enfrijoladas

enfrijoladas
I personally am not a huge fan of earthy flavors, like mushrooms and beans and the like, but after 8 months, I'm starting to feel like I can't describe my blog as a Mexican food blog if I don't start talking about frijoles.

Beans are an important part of Mexican cuisine, but for the non-wealthy, they're downright vital. (Stereotypes are stereotypes for a reason, right?) When I lived in Martinez de la Torre, beans were always at the ready on the stove for a breakfast, lunch or dinner option, but they weren't the Goya cans so predominant and convenient stateside. Instead, every other morning, my suegra would fill a pot with water and at least 2 kgs of frijoles and cook them outside over a wood burning stove for several hours.

Now, down here, rice and beans are popular enough in authentic Mexican cuisine, but their inclusion with every meal at chains like On The Border and Chi-Chi's (which means boobies, by the way) is not quite reflective of my frijol experiences. The most common use of beans that I see is enfrijoladas, and, similar to the previous mentioned enchiladas and enmoladas, enfrijoladas, a true staple of Mexican cuisine, are lightly fried tortillas slathered with refried beans and possibly topped with some garnish or accompanied by an egg.

Ingredients
20 corn tortillas
1 can of pinto or black beans (or refried beans)
salt and pepper, to taste
1/2 cup minced onion
1/2 cup queso fresco, crumbled
oil for frying

Directions

1 - Open a can of beans, but do NOT drain them. Heat some oil in a large saute pan over medium heat. Add the beans along with their bean juice. Fry the beans until soft, and then squish with the back of a wooden spoon or a masher. (Or, puree the can of beans in a blender beofore sauteing.) Add salt and pepper to taste, and set the hot beans aside.

2 - In another pan, heat some more oil over a low flame. Lightly fry the tortillas, about 30 seconds on each side.

3 - Immediately dip the tortillas in the warm beans, and remove to a plate. Fold it over on itself (like a quesadilla).

4 - Once all the tortillas are done and the plates are full, sprinkle the enfrijoladas with the cheese and raw onions.

5 - They are generally eaten with your fingers (which is fun, but not terribly dignified) and at any time of the day.